Monday, December 24, 2012
Thursday, December 13, 2012
Saturday, November 24, 2012
Wednesday, November 14, 2012
Monday, November 12, 2012
A Woodland Angel...
I spent my evening, creating this Ange.
I had a great time making this
Woodland Christmas Angel.
She is about 6ft tall. Her head is sculpted of Paper clay, and hand painted.
Her dress is made of muslin, lightly coffee stained and trimmed with grapevine and golden glittered pine cones.
She wears a grapevine wreath halo, and coffee stained Feathered Wings.
~Abigail~
Sunday, November 11, 2012
Primitive Wooly Sheep Pull Toy...
$49.00
SOLD
Thank you.
I had a bit of a problem with a listing on PfattMarketplace.
My mistake...My sincere apologies for the mix up.
If anyone viewed this listing and saw the incorrect price when trying to purchase my
Sheep Pull Toy ... It is all fixed now.
He is available at
for
SOLD
Thank you.
Saturday, November 10, 2012
PFATTMarketplace Offerings...
More Santa's, offered at PFATTMarketplace come out today.
Beginning at
1:00 pm Eastern.
click here...
Stop by and take a peek.
A Primitive,Winter White Santa, with Primitive Wooly Sheep Pull Toy.
Dressed in his finest Wool Coat.
Folk Art, Primitive Olde Father Christmas, with Pull Toy Sheep.
Mounted on a Antique wood Beehive spool.
~
Sunday, November 4, 2012
Fifty Days...
~Americana Santa~
sold
Till Christmas!
Can you Believe that?
Can you Believe that?
Well, I've been working on Santa's for a while now. And I am truly enjoying myself, as usual.
After 23 years, they are still my most favorite things to make.
After 23 years, they are still my most favorite things to make.
It just never gets old making these
Christmas Characters...
~Olde Papa Noel~
sold
sold
~Ye Olde Christmas Gatherer... Pull Toy~
sold
sold
~Olde Forest Santa~
sold
~Fall Santa~
sold
sold
sold
~Americana Santa~
sold
So many more to make.
ok...now back to my work.
~
Sunday, October 28, 2012
Trip To Olde Lucketts Store...
Oh, and it was my Iphone camera I had used to shoot these pics.
Can't wait to go back again, it's ever changing.
Wonder what they have now.
(click any pic to link to Their site)
Enjoy...
I just love The Olde Lucketts Store.
I've made my way to Luckett's quite a few time this year,
and shot many pictures for sharing here on my blog.
The problem has been, I forgot which camera I used, lol.
Well, I found them so I can finally share them with you.
Oh, and it was my Iphone camera I had used to shoot these pics.
Can't wait to go back again, it's ever changing.
Wonder what they have now.
(click any pic to link to Their site)
Enjoy...
I just love The Olde Lucketts Store.
Wednesday, October 10, 2012
Tuesday, October 2, 2012
A Re-Post...
A Halloween How To...
This Tutorial got a lot of attention this year, so I just thought I'd Share it again.
I've already made one batch this year, and gonna do another.
It is a fun project for all, give it a try and
Enjoy!
I have this little fun Project for you to try.
I made these years ago and was just in the mood to make them again.
And I'd like to share it with you.
To This...
Step 1.
Gather your Oranges,
and cut the tops off.
(save them for later)
Carefully, nice and straight now.
Step 2.
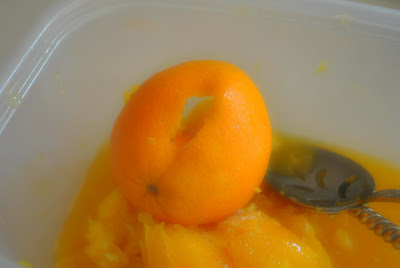
Scoop and Scrape out all the insides,
but be careful, not to rough,
or you will get this...
or you will get this...
This is what you should end up with...
Get your tops, and
carefully cut out the pulp from the tops too.
Step 4.
Place all your hallowed out Oranges and Tops
on a Foil lined cookie sheet.
on a Foil lined cookie sheet.
Step 5.
And here is where you will use your own judgment.
I baked mine at 275 degrees for 2-4 hours.
Watching close so they don't over cook and burn.
Like my first batch did, HA!
So be sure to check on them every half hour or so after the first hour has passed.
If they are to soft or burn to much, it will be difficult to carve the face later.
Almost Ready...
Almost Ready...
You will want them just a little soft for carving easily and just a touch darkened.
They will shrink quite a bit.
See here...
See here...
Draw your Jack-o-lantern face.
I keep it simple here..
Very carefully use an X-acto knife to cut
away pieces.
Poke a tiny hole one each side of your pumpkin,
and run a rusty wire through and with pliers, curl the end of the wire to stay in place.
and run a rusty wire through and with pliers, curl the end of the wire to stay in place.
Step 8.
Glue in some moss and glue on the tops...
Decorate as you wish.
Subscribe to:
Comments (Atom)


.JPG)


